|
See
Also
To Run the Upgrade Wizard:
| 1.
|
From the Upgrade Tool's File menu, choose Start Upgrade. |
The first Upgrade Wizard
dialog is displayed.
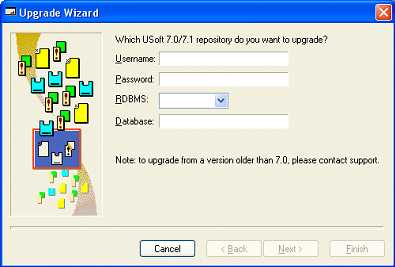
| 2.
|
Type the user name and password you use when connecting to the
database. |
| 3.
|
From the pull down list in the RDBMS field, choose the RDBMS
type you are connecting to. |
Note that the RDBMS type you
specify here must be the same as the type you specified when you
installed the USoft Developer Series.
| 4.
|
In the Database field, specify the string you use to identify
the database to which you are connecting (sometimes known as a
connect string). For Oracle over SQL*Net V2, for example, this
would be of the form: |
<machine_name><database_sid>
See your RDBMS documentation
set for more information
| 5.
|
Press Next to continue. The second dialog is then
displayed. |
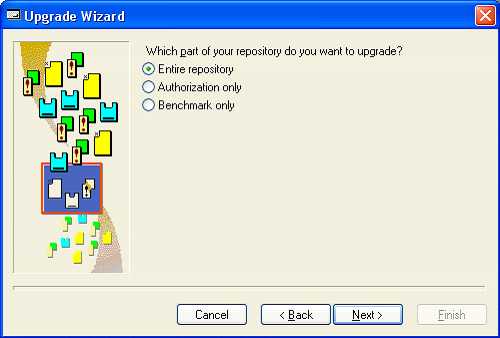
| 6.
|
Choose whether you want to upgrade the entire repository or
just the authorization tables. You can also choose to upgrade
BenchMark only; this may be useful, for example, if you run
BenchMark from a different repository, or under a different user to
the main application. |
| 7.
|
Click Next to continue. A confirmation dialog is
displayed. |
| 8.
|
Click Finish to start the automated upgrade. Note that this may
take some time. |
NOTE:
Once set up and started, the Upgrade Wizard will take some time
to complete all the tasks it has to perform. During this time, no
user intervention is required. All actions performed, and
exceptions found, are recorded in a log file.
Related Topics
Log
File
|

