Pattern 4: Master-detail form on a single page |
|
|
|
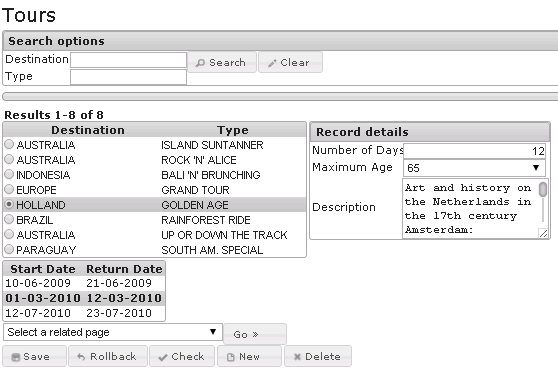
In this design pattern, the Results area includes an extra data block showing child data belonging to the selected parent record (if any exist). This is a "master-detail" form: if you change the selection of the parent or master, you automatically get different corresponding children or details (if any). In the example, the extra pane shows just the Start Date and End Date of any Scheduled Tours of the type selected in the parent block. That is sufficient if the main purpose of the new block is to let the user inspect, and maybe select, corresponding Scheduled Tours. Alternatively, you could offer ALL the Scheduled Tour child columns in this form. That would create a true "master-detail form": the user would not need to navigate to any further page to manipulate either Tours or Scheduled Tours. In the example, a typical further adjustment (not shown) would be to let the user select a child record in the newly added block, and then let her navigate to a next page showing just the details of that child record, not of sibling child records. This would involve adding a "Go" button to the new block, and perhaps also removing the option of navigating to Scheduled Tours children from the standard "Select a related page" list, since this navigation path would now be provided by the new button.
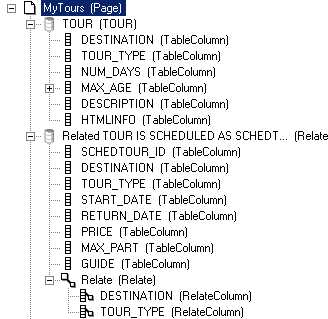
To create the "master-detail" form by adding the extra child block as shown:
NOTE: A similar result can be achieved by embedding a related page into the info page (as opposed to inserting a TableDataSource object in the main Page object).
See Also Page and Data Source Constructs
|

|