|
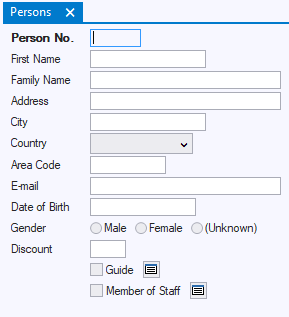
Info boxes are GUI classes that are building blocks for your application. They allow end users to interact with data. For example, an info box called Persons could look like this:

To design an info box class:
| 1. | In the Windows Designer catalog, click on the Info Boxes tab page. |
| 2. | In the tree view, identify a default class that looks like the info box you have in mind. Right-click on it and choose New from the context menu. |
| A new info box subclass appears as a child node. |
| 3. | Right-click on the new subclass, choose Rename from the context menu, and type an appropriate name for your new subclass. |
•Open the Property Inspector to change property values of objects. •Open the Controls tab page in the catalog , and insert new objects into the info box class by dragging-and-dropping them onto the design view of the dialog class. |
To call an info box you have designed:
| For example, If the info box must open when the user chooses a menu option, open the menu class and select the menu line object. |
| 2. | Open the Property Inspector for the object, and select the event property that corresponds to the event you want to associate with the info box. |
| For example, if the info box must open when the user chooses a menu option, select the menu line's Script property. |
| 3. | Set the property to the action statement: |
info-box-class.Window.Create( )
|
|
